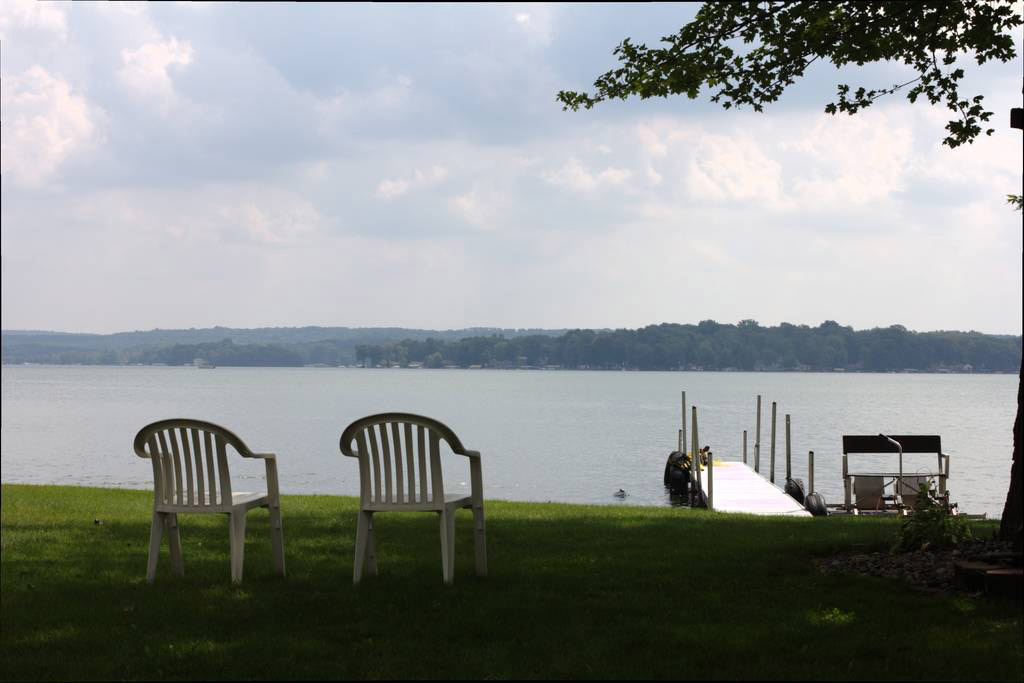
St. Johns River by Heather Hummel

St. Johns River by Heather Hummel
St. Johns River by Heather Hummel Photography
Showing posts with label cameras. Show all posts

Monday, September 14, 2015

The Evolution of Real Estate Photography


Real estate photography has historically showcased disastrous images. We've all seen the images of a bathroom with the toilet seat up, a bedroom with an unmade bed or the laundry basket overflowing, kids' toys scattered about their rooms, personal photos covering the walls, and so on and so forth. Add to the list images that are blurry, too dark, too light, or taken from a misguided angle. It's a wonder some houses sold at all.

Photo Credit: Heather Hummel Photography
Recently, with the advent of websites like Zillow and Trulia, the pressure is on for agents to deliver high quality images to potential buyers. After looking at a lot of real estate sites, I couldn't help but notice that the quality of images has increased greatly. It is evident that real estate agents are taking online presence and the influence of images much more seriously, and I believe this is due to their effort to hire professional photographers for the jobs. Yes, anyone can take a photo with an iPhone or Droid, but that doesn't mean the quality is of a professional level. However, there is some debate that the images of today aren't really fairly representing homes. As one Facebook friend in Boise, Idaho pointed out, "Some of these photographers are Photoshopping images for realtors so poorly; you don't know if you're shopping for properties in Boise or in Toontown." He is correct. Real estate agents have to keep it real. Too many images make a home look bigger and brighter than it really is, which leads to a big letdown when potential buyers show up for a viewing.


Photo Credit: Heather Hummel Photography
I consistently photograph new listings for Charlottesville, Virginia's seasoned real estate agent, Joan Esposito of Roy Wheeler, who says, "A great photographer is critical to our marketing plan. They can make every property, no matter what the price range, stand out...and this makes our phones ring!" Joan is great to collaborate with because she has a keen eye for a listing and the type of images that best represent it. Staging is also an art that she intuitively knows how to do, and one that makes photographing properties much easier. Besides her listings, I have photographed properties in coastal northern Florida, which is a completely different type of community than the Blue Ridge Mountains. Regardless of location, though, there are simple staging concepts that make for good interior real estate photography.

1. Turn on the lights. If there isn't enough light, create it and be sure to replace blown bulbs.
2. Make the beds; ideally with linens that match.
3. Fold towels in bathrooms and place on shelves or hang neatly on racks.
4. Declutter all counter tops in the kitchens and bathrooms, but leave a splash of color in the form of fruit or flowers on the kitchen counter.
5. Remove pictures and magnets from the refrigerator.
6. In the kitchen, put away cluttering items, such as trash cans, sponges, soap, and dish or cleaning cloths.
7. Vacuum carpets and hard wood floors.
8. De-clutter and de-personalize so potential buyers can imagine the home as their own.

Once the photos are professionally captured, real estate photographers greatly benefit from outsourcing the editing work to a quality service such as PhotoUp in Grand Rapids, Michigan and Cebu, Philippines. Real estate photographer Jason Johnson is one photographer who takes advantage of PhotoUp's editing services.


"Before" Photo Credit Jason Johnson, Grand Rapids, Michigan


"After" Edit by PhotoUp: Photo Credit Jason Johnson, Grand Rapids, Michigan

"Before" Photo Credit Jason Johnson, Grand Rapids, Michigan
 
"After" Edit by PhotoUp: Photo Credit Jason Johnson, Grand Rapids, Michigan

However, PhotoUp isn't only a photo editing service. They champion photographers and help them grow their business. "We're the only ones out there doing this transparently, and real estate happens to be our niche. We have a team in the Philippines that work in a Google-like office. It's a very creative environment. We find great ways to impact the photographers and the communities in which we work," says Chris Palmer of PhotoUp. While some photographers might be leery of outsourcing, Chris points out that they allay those fears. "We do customized stylization so clients who want a particular style and consistent look to their images can have it. We see the relationship with our clients as a collaborative team effort where we dedicate our time to learning the photographer's particular style."
"Before" Photo Credit Jason Johnson, Grand Rapids, Michigan

"After" Edit by PhotoUp: Photo Credit Jason Johnson, Grand Rapids, Michigan
Building a real estate photography business takes a lot of work from marketing to shooting to editing to delivering, so to be able to outsource the editing is a great advantage for freeing up valuable time. "We're always exploring new ways to help photographers scale and grow their businesses. The ultimate goal for a real estate photographer is to have a team of photographers shooting for them and an editing team processing their images because editing isn't a revenue producing function. Photographers ought to be out there shooting. With us, they have access to editing twenty-four hours a day and five and a half to six days a week, depending on the plan they are on. Instead of spending hours editing, they can upload their images to us and go enjoy a glass of wine with their spouse." In Florida, I photographed a client's house while passing through. It was a cloudy day, so the skies were gray. I was leaving the next morning and wasn't able to go back and re-photograph it with blue skies.

"Before" Photo Credit: Heather Hummel Photography
"After: Dusk" Edit by PhotoUp Photo Credit: Heather Hummel Photography

"After: Blue Sky" Edit by PhotoUp Photo Credit: Heather Hummel Photography
So, I sent this image in RAW format to PhotoUp and was very happy with their editing work. The addition of blue sky and the dusk effect were just right. The images were sent back to me quickly and efficiently, and I was able to pass them on to my client.

At the time of writing this article, Charlottesville has approximately 310 real estate listings by agents. As I searched through listings, I still found images with toilet seats up, magnets on the refrigerator, and some that could clearly have used a professional editing service, but overall the quality was improved.

One thing is for sure, each property boasted closer to 35 images, versus the dozen or so used in the earlier days of online real estate. There is no doubt that the evolution of real estate photography has reached milestones and continues to grow.

Note: This blog post from PhotoUp provides valuable tips as well.

Friday, August 21, 2015

Barren Optimism: How My Photography Is Influenced by Andrew Wyeth's Paintings


"Barren Optimism" Photo Credit: Heather Hummel Photography

I captured this self-portrait, titled "Wading Through," at King Family Vineyards in rural Crozet, Virginia. When I asked the owner, James King, about the field's status, he indicated that it had peaked two weeks earlier, on July 12th. He could not have known that was also my 50th birthday.

The next day, I ventured out to the field anyway. I passed a polo match, carrying my camera, lenses, filters, and tripod, and headed to the way-back corner of the property. When I turned the corner past the long fences, I liked what I saw. The sunflowers were mostly died off with just enough still hanging in there. The metaphor was strong. It set a different tone than the typical field of flowers--one that began a photo shoot that was inspired by my love for Andrew Wyeth's work.

The sunflower scene brought the words "barren optimism" to mind, Andrew Wyeth's "Christina's World" being my inspiration.

Having studied Wyeth's work some years ago, I knew that he and I shared a lot of commonalities beyond our mutual respect for hillsides and nature. We share the same birthday, July 12th (his 1917, mine 1965); he is one of five children, I am one of six; he had a medically challenged childhood that kept him home schooled, I was home most of my 3rd grade year due to a congenital heart defect that lead to my first open heart surgery in 1974; and one of his many muses was his dog who looked just like my own dog, Stephan.
It was Wyeth's work "Master Bedroom" that became my favorite even before Stephan came into my life.

"Stephan" Photo Credit: Heather Hummel Photography

Wyeth spent his years between his home in Pennsylvania and his summer home in Maine. I grew up in New England, but have traveled across the United States several times. We are both inspired by nature, and I find that his work rather barren with a hint of optimism, hence my term barren optimism.

As can happen with a muse or inspiration, I hadn't realized how much Wyeth's work had influenced my photography until I captured the sunflower field self-portrait. Wyeth remains a favorite, and during my future photo shoots, I will certainly have him in the back of my mind as I analyze the scene before me, the light, and the opportunity for barren optimism.

This post originally appeared on the Huffington Post.


Tuesday, July 14, 2015

8 Steps for Awesome Full Moon Photos

Photo Credit: Heather Hummel Photography
This month is a Blue Moon month. Needless to say, Facebook News Feeds, Instagram, and Twitter are aglow with blurry white blobs! Tossed into the bunch are gorgeous images of the full moon, perhaps reflecting on waters or rising over a mountainside.

(Note that while new smartphones now accommodate shutter speed technology, which is amazing, this article speaks to using a DSLR camera, which has control of ISO, shutter speed (including Bulb), and aperture settings.)


With so many opportunities to photograph a full moon in a given year, there are many chances to improve full moon photography skills where you can go from the white blob in the top photo to the crater defined full moon images below:
From this:

White Blob!
To this:
Photo Credit: Heather Hummel Photography


Here are 8 steps for photographing the Full Moon. They are a foundational place to start, and depending on individual results, can (and should) be adjusted accordingly.

1. In order to enlarge the moon and show the details of the surface, use a good telephoto lens that is longer than 200 mm. Alternatively, such as in this example, if there is a landscape foreground, the focal length could be a wide angle.

Moonrise in the Rocky Mountains
Photo Credit:Heather Hummel Photography


2. Set the Camera Mode to Manual.

3. Set the ISO to 100 or whatever the base ISO is for your camera. Again, this is just a starting point. Some of these images were shot at higher ISOs.

4. Set the Aperture to f/11, whether using Manual Mode or Aperture Priority.

5. Set the shutter speed to 1/125 with an ISO of 100. If the ISO is set for 200, use a shutter speed of 1/250.

6. Set the focus to Manual. This is often done right on the lens.

7. Set the lens to focus on the center of the infinity sign. Note: Higher end cameras can accommodate infinity in different ways. This step is for more basic DSLR cameras.

8. Set the self-timer to two-seconds and press the shutter release. Depending on the results, either slow down or speed up the shutter speed. For example, if you are still getting a white blob, speed up the shutter speed. This is key: the reason for the white blob is the shutter speed is too slow, allowing the moon light to over expose the image. Speed it up, and you'll see greater moon surface definition.

Moon Rising Over Point Lobos
Photo Credit: Heather Hummel Photography

Accessories:
In order to achieve even better results, add these accessories to your camera bag.


Filters: There will be situations where an filter will help to keep down the white blob effect. A neutral gradient graduated filter, such as this one by Tiffen, can help to shade the brightness of the moon while allowing more light on the foreground. If there are foregrounds such as the ones in the above examples, use a ND graduated filter to even out the foreground and the sky.
 
Tiffen 67mm Color Graduated Neutral Density 0.6 Filter

This example is a 67mm, be sure to get the right mm size for your lens(es).

Tripods:  I always use a tripod, such as Ravelli or Manfrotto, while on low light photography shoots.


Ravelli APLT4 61-inch Light Weight Aluminum Tripod With Bag
 
 Manfrotto MKCOMPACTLT-BK Compact Tripod (Black)


Remote Shutter Release:
For under $10, I highly recommend picking up a remote shutter release. Even though the camera should be set to a 2 second self-timer, having the remote shutter release adds to the reduction of camera shake. I use mine all the time in conjunction with the self-timer.
This top one is an example of one for Canons.


FotoTech FTRC-6 IR Wireless Shutter Release Remote For Canon EOS 5DS, 5DR, 7D Mark II, EOS 6D, EOS 7D, EOS 70D, EOS 60Da, EOS 60D, EOS 5D Mark III, EOS 5D Mark II, SL1, T6s, T6i, T5i, T4i, T3i, T2i, T1i Digital SLRS(Replaces Canon RC-5 RC-6) with FotoTech Velvet Bag

And this is an example of one for Nikons.

FotoTech ML-L3 Wireless Shutter Release Remote For Nikon D750, D5500, D5300, D610, D7200, D7100, D3300, D3000, D3200, D5200, D5100, D5000, D7000, D60, D80, D90, D600, CoolPix P7800, Coolpix P7000, P6000, P7100, N65, N75, Coolpix 8400, 8800, Pronea S, Nuvis S, Nikon 1 J1, Nikon 1 J2 Nikon 1 V1 V2 V3 Digital SLRS with FotoTech Velvet Bag

Between the filters, tripod, and remote shutter release, your full moon images will be on par with the pros!

Want to learn how to master low light photography and to capture your own low-light photos? My book MASTER LOW LIGHT PHOTOGRAPHY is available on Amazon.

Wednesday, July 8, 2015

iblazr Lights Up the Selfie World: My Latest Photography Gadget Review

Photo Courtesy of iblazr
As a photographer, I don't leave home without my camera and its accessories. Camera body--check. Filters--check. Tripods--check. Lenses--check. Camera bag with odds and ends--check.

Lately I have been adding new accessories to my camera bag, except they have been for my iPhone, which is actually helping with my DSLR photography. How? I recently started a YouTube series titled "In the Field with Heather Hummel Photography" where I walk viewers through the scenes as I am capturing them and why I choose the camera settings for that scene. I have filmed three videos to date by using the video feature on my iPhone (since my Canon is the star of the videos).


I love taking my audience to the places I photograph--lakes, rivers, and even rooftops. The two obstacles I had to overcome were how could I selfie-video the scenes and how would I handle low light situations with the iPhone? The video selfie was managed with use of the Gekkopod (read my previous review).

Photo Courtesy of iblazr
Happily, I can now say that the low light situation has been resolved with the iBlazr! I have written about the importance of using a tripod in low light photography, but that was from the standpoint of using a DSLR. Now that I am using my iPhone for video, I need extra light cast on me while I'm explaining the upcoming shot. In other words, I didn't want the iPhone filming me in the dark! The iblazr's ongoing fill-flash while shooting both video or still photos is incredibly effective considering its size. It is a terrific addition to a camera bag!
Photo Courtesy of iblazr

iblazr was designed by a team of four inventors who thought up the idea of a tiny LED flash for smartphones. They initially launched on Kickstarter two years ago, but the was iblazr quick to be found in retail stores, such as the Apple Store, Best Buy, and Walmart. It's success lead to the forthcoming version, iblazr 2, the second generation, which is said to be the first native camera synced LED on the market that is compatible with both iOS and Android smartphones and tablets. Their latest Kickstarter campaign is already well over $170K from 2,500 backers.

Photo Courtesy of iblazr
In a world where selfies dominate Facebook, Twitter, and Instagram, I wasn't surprised to learn that this product is such a hit. From the portrait photography standpoint, a fill-flash brightens the face, which softens the skin. Strong shadows on faces can age someone while also create unwanted grain in images. Neither are flattering effects in selfies! With Bluetooth syncing, a mount clip, a cold shoe stand for digital and analog cameras, a silicon diffuser with a key chain, a micro USB to USB charger, and a variety of uses as an off-camera flash, I found the iblazer to be very versatile!

Photo Courtesy of iblazr
With the iblazr in hand with the Gekkopod, I am even more excited to be out shooting videos with my iPhone for the "In the Field with Heather Hummel Photography" series.

Photo Courtesy of iblazr

But, that is only scratching the surface for the uses of these combined products. I highly recommend checking out iblazr's website, http://iblazr.com, for more info.

To purchase the first generation iblazr on Amazon click here: iBlazr Original LED Flash for iPhone & iPad (White), LED Light for iPad and Android devices + Cold Shoe Mount for digital cameras (DSLR) by Concepter.

Saturday, July 4, 2015

Why President Bill Clinton Is So Difficult to Photograph


President Bill Clinton and actor Bill Murray are two of the toughest people I've ever photographed.
Why? Because they are so animated! That characteristic might seem like a plus, but remember, a photo is captured in a fraction of a second. By a fraction of a second, I mean 1/250 on average for a good shot that avoids camera shake or blurring. In that split second, an animated face can give you enough contortions to land a spot on the Vegas Strip. From funky mouths to sucked in cheeks to rolling eyes, just about any expression can come up. As such, I spend a lot of time waiting for the subject to relax their faces before pressing the shutter.


Ironically, what saved me with photographing both of these Bills were their gestures. A photo should tell a story, and in that regard, an animated subject is certain to deliver. The hand gestures in these images tell the viewer that they are engaging their audiences, one in a political campaign and the other on the golf course. Both are in their element, and that, I'm certain, brings them even more alive. It comes down to simple body language, and these two know how to speak it well. The hand motions of pointing left, pointing right, and aiming up high indicates excitement, direction, and activity. Audiences love the sense of interaction because it makes them feel connected, which wins them over and makes the experience memorable.

It's not unusual for a portrait photographer to capture hundreds of images of a client in a session. Most professional photographers won't show all the images, and believe me, there are many shots that land in a pile of pixel dust on the floor. A photographer in the field, who isn't directing their subject on how to pose, where to sit, or which way to tilt their head, has to anticipate the person's next move and be ready to capture it in that 1/250 of a second. Therein lies the art of being a street photographer or a candid portrait photographer. (Note: I intentionally leave the term "paparazzi" out of this because those are photographers who hunt down celebrities and public figures to capture them in private moments. The celebrities and public figures I capture are in public forums and expect to be photographed.)


A portrait photographer will present their clients with the top 50 or so images and from there narrow it down to the best of the best with their client. A landscape photographer, on the other hand, will likely only share the best one, perhaps two, of a particular scene. For my purposes here, I am sharing a few of the more quirky ones to make my point.

I've photographed enough famous people, such as Deepak Chopra, Arianna Huffington, Kevin Costner, Huey Lewis, Kenny G, Ray Romano, and even down to local politicians. From camera settings to coping with whatever lighting you're given on the scene, to not being able to give posing directions, it takes a different kind of approach than the portrait sessions I've done. I embrace the challenge, and while it may seem like shooting pixels in the dark, eventually, after catching enough images, a good one always shows up.


At least his book covers got it right!


My Life

Back to Work: Why We Need Smart Government for a Strong Economy


Thursday, July 2, 2015

Back Road Travels: The Old Coast Road from Bixby Bridge to Big Sur


2013-11-13-HeatherHummel_BixbyBridge.jpg
Photo Credit: Heather Hummel Photography

Over the years, I have driven across the United States eight times and up and down the western and eastern coastlines more times than I can remember. As a landscape photographer, of all the places I've traveled, Big Sur, California remains my favorite. In my automobile adventures with my camera and two dogs by my side, I've discovered some remarkable back road routes that steer clear of tourists, but none is quite like the one I'm about to share with you.

The Pacific Coast Highway (also known as Highway 1) in California is famous for its breathtaking coastal views. The Central Coast that runs from Carmel to Big Sur is, in my experience and opinion, the most scenic stretch. When the fog lifts, expect to see the beautiful jagged coastline framed with ice plant and rock formations. The land is dotted with cows and boasts views of the Pacific's frothy waves lapping along the shore, sometimes hundreds of feet below.

The back road from the famous Bixby Bridge to Big Sur is one that most tourists and travelers don't know about. Heading south, they often stop at the tourist turn off (scenic overlook) just before the bridge, hop out of their cars and snap a few selfies with the bridge behind them.

As you can tell from the image at the top, this is not what I did. The first giveaway is that my image has the Pacific Ocean behind it; whereas, the tourist turn off angle will net you the mountainside. Instead, take a left turn (when heading south, of course!) at the Bixby Bridge onto Old Coast Road. The views on this road provide an entirely different perspective for several miles. I have driven this back road route a few times, and can tell you that in my last trip it took two hours, but I also stopped to capture 95 images. Note that once you begin, it's not easy to turn around, and, as you'll see, I was in a Subaru Outback...AWD or 4 WD is highly recommended. (Don't say I didn't warn you!)

Below are some of the images that I selected in order to show a bit of what this alternate route looks like. The captions under the images tell the rest of the story.

2013-11-13-BixbyBridgeLeaves.jpg
Photo Credit: Heather Hummel Photography
Bixby Bridge from the Old Coast Road. You can see a smidgen of the road/entrance on the right.

2013-11-13-BigSurBackRoads029.jpg
Photo Credit: Heather Hummel Photography
I set out with my dogs and Canon the day after a big storm. As you can see, trees were down, but you can't stop a Subaru with a few sticks in the road.

2013-11-13-BigSurBackRoads032.jpg
Photo Credit: Heather Hummel Photography
After clearing the road, I came upon this scenic view of Redwood trees a few tenths of a mile later. Definitely worth picking up a few sticks for.


2013-11-13-BigSurBackRoads073.jpg
Photo Credit: Heather Hummel Photography
About midway, at the peak, the clearing provides stunning panoramic views, and this "Rock Pasture" in the midst.

2013-11-13-BigSurBackRoads049.jpg
Photo Credit: Heather Hummel Photography
After photographing the Rock Pasture, I looked down to see where we were heading...Seriously? I was glad to be in my Subaru! Another example as to why they (and I) highly recommend an AWD or 4WD vehicle. 


2013-11-13-VantagePoint.jpg
Photo Credit: Heather Hummel Photography
As the road starts to come down the other side into Big Sur, the views of the Pacific Ocean and Highway 1 open up again.

2013-11-13-BigSurBackRoadsHwy1View2.jpg
Photo Credit: Heather Hummel Photography
One last peak before descent.

If you're already in Big Sur, you can take Old Coast Road north and just go up a few miles and see these last few views shown. From the Bixby Bridge end, it's quite a drive - about 14 miles of rough roads - through the redwoods and mountains. The experience is very unique compared to what most visitors do, but be sure you have the right kind of car and be ready to be jostled. The captivating views and poetic beauty is worth the trip.


Want to learn how to master low light photography and to capture your own low-light photos? My book MASTER LOW LIGHT PHOTOGRAPHY is available on Amazon.