St. Johns River by Heather Hummel

St. Johns River by Heather Hummel
St. Johns River by Heather Hummel Photography
Showing posts with label Heather Hummel Photography. Show all posts

Monday, September 14, 2015

The Evolution of Real Estate Photography


Real estate photography has historically showcased disastrous images. We've all seen the images of a bathroom with the toilet seat up, a bedroom with an unmade bed or the laundry basket overflowing, kids' toys scattered about their rooms, personal photos covering the walls, and so on and so forth. Add to the list images that are blurry, too dark, too light, or taken from a misguided angle. It's a wonder some houses sold at all.

Photo Credit: Heather Hummel Photography
Recently, with the advent of websites like Zillow and Trulia, the pressure is on for agents to deliver high quality images to potential buyers. After looking at a lot of real estate sites, I couldn't help but notice that the quality of images has increased greatly. It is evident that real estate agents are taking online presence and the influence of images much more seriously, and I believe this is due to their effort to hire professional photographers for the jobs. Yes, anyone can take a photo with an iPhone or Droid, but that doesn't mean the quality is of a professional level. However, there is some debate that the images of today aren't really fairly representing homes. As one Facebook friend in Boise, Idaho pointed out, "Some of these photographers are Photoshopping images for realtors so poorly; you don't know if you're shopping for properties in Boise or in Toontown." He is correct. Real estate agents have to keep it real. Too many images make a home look bigger and brighter than it really is, which leads to a big letdown when potential buyers show up for a viewing.


Photo Credit: Heather Hummel Photography
I consistently photograph new listings for Charlottesville, Virginia's seasoned real estate agent, Joan Esposito of Roy Wheeler, who says, "A great photographer is critical to our marketing plan. They can make every property, no matter what the price range, stand out...and this makes our phones ring!" Joan is great to collaborate with because she has a keen eye for a listing and the type of images that best represent it. Staging is also an art that she intuitively knows how to do, and one that makes photographing properties much easier. Besides her listings, I have photographed properties in coastal northern Florida, which is a completely different type of community than the Blue Ridge Mountains. Regardless of location, though, there are simple staging concepts that make for good interior real estate photography.

1. Turn on the lights. If there isn't enough light, create it and be sure to replace blown bulbs.
2. Make the beds; ideally with linens that match.
3. Fold towels in bathrooms and place on shelves or hang neatly on racks.
4. Declutter all counter tops in the kitchens and bathrooms, but leave a splash of color in the form of fruit or flowers on the kitchen counter.
5. Remove pictures and magnets from the refrigerator.
6. In the kitchen, put away cluttering items, such as trash cans, sponges, soap, and dish or cleaning cloths.
7. Vacuum carpets and hard wood floors.
8. De-clutter and de-personalize so potential buyers can imagine the home as their own.

Once the photos are professionally captured, real estate photographers greatly benefit from outsourcing the editing work to a quality service such as PhotoUp in Grand Rapids, Michigan and Cebu, Philippines. Real estate photographer Jason Johnson is one photographer who takes advantage of PhotoUp's editing services.


"Before" Photo Credit Jason Johnson, Grand Rapids, Michigan


"After" Edit by PhotoUp: Photo Credit Jason Johnson, Grand Rapids, Michigan

"Before" Photo Credit Jason Johnson, Grand Rapids, Michigan
 
"After" Edit by PhotoUp: Photo Credit Jason Johnson, Grand Rapids, Michigan

However, PhotoUp isn't only a photo editing service. They champion photographers and help them grow their business. "We're the only ones out there doing this transparently, and real estate happens to be our niche. We have a team in the Philippines that work in a Google-like office. It's a very creative environment. We find great ways to impact the photographers and the communities in which we work," says Chris Palmer of PhotoUp. While some photographers might be leery of outsourcing, Chris points out that they allay those fears. "We do customized stylization so clients who want a particular style and consistent look to their images can have it. We see the relationship with our clients as a collaborative team effort where we dedicate our time to learning the photographer's particular style."
"Before" Photo Credit Jason Johnson, Grand Rapids, Michigan

"After" Edit by PhotoUp: Photo Credit Jason Johnson, Grand Rapids, Michigan
Building a real estate photography business takes a lot of work from marketing to shooting to editing to delivering, so to be able to outsource the editing is a great advantage for freeing up valuable time. "We're always exploring new ways to help photographers scale and grow their businesses. The ultimate goal for a real estate photographer is to have a team of photographers shooting for them and an editing team processing their images because editing isn't a revenue producing function. Photographers ought to be out there shooting. With us, they have access to editing twenty-four hours a day and five and a half to six days a week, depending on the plan they are on. Instead of spending hours editing, they can upload their images to us and go enjoy a glass of wine with their spouse." In Florida, I photographed a client's house while passing through. It was a cloudy day, so the skies were gray. I was leaving the next morning and wasn't able to go back and re-photograph it with blue skies.

"Before" Photo Credit: Heather Hummel Photography
"After: Dusk" Edit by PhotoUp Photo Credit: Heather Hummel Photography

"After: Blue Sky" Edit by PhotoUp Photo Credit: Heather Hummel Photography
So, I sent this image in RAW format to PhotoUp and was very happy with their editing work. The addition of blue sky and the dusk effect were just right. The images were sent back to me quickly and efficiently, and I was able to pass them on to my client.

At the time of writing this article, Charlottesville has approximately 310 real estate listings by agents. As I searched through listings, I still found images with toilet seats up, magnets on the refrigerator, and some that could clearly have used a professional editing service, but overall the quality was improved.

One thing is for sure, each property boasted closer to 35 images, versus the dozen or so used in the earlier days of online real estate. There is no doubt that the evolution of real estate photography has reached milestones and continues to grow.

Note: This blog post from PhotoUp provides valuable tips as well.

Friday, August 21, 2015

Barren Optimism: How My Photography Is Influenced by Andrew Wyeth's Paintings


"Barren Optimism" Photo Credit: Heather Hummel Photography

I captured this self-portrait, titled "Wading Through," at King Family Vineyards in rural Crozet, Virginia. When I asked the owner, James King, about the field's status, he indicated that it had peaked two weeks earlier, on July 12th. He could not have known that was also my 50th birthday.

The next day, I ventured out to the field anyway. I passed a polo match, carrying my camera, lenses, filters, and tripod, and headed to the way-back corner of the property. When I turned the corner past the long fences, I liked what I saw. The sunflowers were mostly died off with just enough still hanging in there. The metaphor was strong. It set a different tone than the typical field of flowers--one that began a photo shoot that was inspired by my love for Andrew Wyeth's work.

The sunflower scene brought the words "barren optimism" to mind, Andrew Wyeth's "Christina's World" being my inspiration.

Having studied Wyeth's work some years ago, I knew that he and I shared a lot of commonalities beyond our mutual respect for hillsides and nature. We share the same birthday, July 12th (his 1917, mine 1965); he is one of five children, I am one of six; he had a medically challenged childhood that kept him home schooled, I was home most of my 3rd grade year due to a congenital heart defect that lead to my first open heart surgery in 1974; and one of his many muses was his dog who looked just like my own dog, Stephan.
It was Wyeth's work "Master Bedroom" that became my favorite even before Stephan came into my life.

"Stephan" Photo Credit: Heather Hummel Photography

Wyeth spent his years between his home in Pennsylvania and his summer home in Maine. I grew up in New England, but have traveled across the United States several times. We are both inspired by nature, and I find that his work rather barren with a hint of optimism, hence my term barren optimism.

As can happen with a muse or inspiration, I hadn't realized how much Wyeth's work had influenced my photography until I captured the sunflower field self-portrait. Wyeth remains a favorite, and during my future photo shoots, I will certainly have him in the back of my mind as I analyze the scene before me, the light, and the opportunity for barren optimism.

This post originally appeared on the Huffington Post.


Saturday, July 11, 2015

In the Field with Heather Hummel Photography - Jacksonville, Florida

"In the Field with Heather Hummel Photography"
On location in Jacksonville, Florida shooting the sunset over the St. John's River. 


Want to learn how to master low light photography and to capture your own low-light photos? My book MASTER LOW LIGHT PHOTOGRAPHY is available on Amazon.

Wednesday, July 8, 2015

iblazr Lights Up the Selfie World: My Latest Photography Gadget Review

Photo Courtesy of iblazr
As a photographer, I don't leave home without my camera and its accessories. Camera body--check. Filters--check. Tripods--check. Lenses--check. Camera bag with odds and ends--check.

Lately I have been adding new accessories to my camera bag, except they have been for my iPhone, which is actually helping with my DSLR photography. How? I recently started a YouTube series titled "In the Field with Heather Hummel Photography" where I walk viewers through the scenes as I am capturing them and why I choose the camera settings for that scene. I have filmed three videos to date by using the video feature on my iPhone (since my Canon is the star of the videos).


I love taking my audience to the places I photograph--lakes, rivers, and even rooftops. The two obstacles I had to overcome were how could I selfie-video the scenes and how would I handle low light situations with the iPhone? The video selfie was managed with use of the Gekkopod (read my previous review).

Photo Courtesy of iblazr
Happily, I can now say that the low light situation has been resolved with the iBlazr! I have written about the importance of using a tripod in low light photography, but that was from the standpoint of using a DSLR. Now that I am using my iPhone for video, I need extra light cast on me while I'm explaining the upcoming shot. In other words, I didn't want the iPhone filming me in the dark! The iblazr's ongoing fill-flash while shooting both video or still photos is incredibly effective considering its size. It is a terrific addition to a camera bag!
Photo Courtesy of iblazr

iblazr was designed by a team of four inventors who thought up the idea of a tiny LED flash for smartphones. They initially launched on Kickstarter two years ago, but the was iblazr quick to be found in retail stores, such as the Apple Store, Best Buy, and Walmart. It's success lead to the forthcoming version, iblazr 2, the second generation, which is said to be the first native camera synced LED on the market that is compatible with both iOS and Android smartphones and tablets. Their latest Kickstarter campaign is already well over $170K from 2,500 backers.

Photo Courtesy of iblazr
In a world where selfies dominate Facebook, Twitter, and Instagram, I wasn't surprised to learn that this product is such a hit. From the portrait photography standpoint, a fill-flash brightens the face, which softens the skin. Strong shadows on faces can age someone while also create unwanted grain in images. Neither are flattering effects in selfies! With Bluetooth syncing, a mount clip, a cold shoe stand for digital and analog cameras, a silicon diffuser with a key chain, a micro USB to USB charger, and a variety of uses as an off-camera flash, I found the iblazer to be very versatile!

Photo Courtesy of iblazr
With the iblazr in hand with the Gekkopod, I am even more excited to be out shooting videos with my iPhone for the "In the Field with Heather Hummel Photography" series.

Photo Courtesy of iblazr

But, that is only scratching the surface for the uses of these combined products. I highly recommend checking out iblazr's website, http://iblazr.com, for more info.

To purchase the first generation iblazr on Amazon click here: iBlazr Original LED Flash for iPhone & iPad (White), LED Light for iPad and Android devices + Cold Shoe Mount for digital cameras (DSLR) by Concepter.

Thursday, July 2, 2015

Back Road Travels: The Old Coast Road from Bixby Bridge to Big Sur


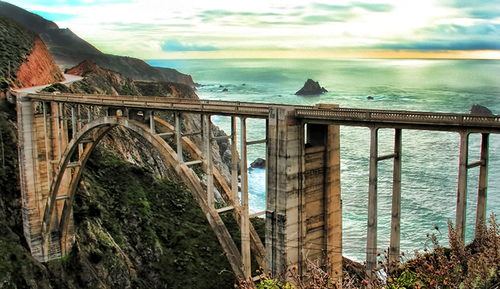
2013-11-13-HeatherHummel_BixbyBridge.jpg
Photo Credit: Heather Hummel Photography

Over the years, I have driven across the United States eight times and up and down the western and eastern coastlines more times than I can remember. As a landscape photographer, of all the places I've traveled, Big Sur, California remains my favorite. In my automobile adventures with my camera and two dogs by my side, I've discovered some remarkable back road routes that steer clear of tourists, but none is quite like the one I'm about to share with you.

The Pacific Coast Highway (also known as Highway 1) in California is famous for its breathtaking coastal views. The Central Coast that runs from Carmel to Big Sur is, in my experience and opinion, the most scenic stretch. When the fog lifts, expect to see the beautiful jagged coastline framed with ice plant and rock formations. The land is dotted with cows and boasts views of the Pacific's frothy waves lapping along the shore, sometimes hundreds of feet below.

The back road from the famous Bixby Bridge to Big Sur is one that most tourists and travelers don't know about. Heading south, they often stop at the tourist turn off (scenic overlook) just before the bridge, hop out of their cars and snap a few selfies with the bridge behind them.

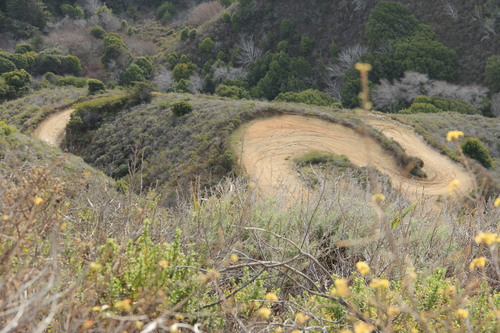
As you can tell from the image at the top, this is not what I did. The first giveaway is that my image has the Pacific Ocean behind it; whereas, the tourist turn off angle will net you the mountainside. Instead, take a left turn (when heading south, of course!) at the Bixby Bridge onto Old Coast Road. The views on this road provide an entirely different perspective for several miles. I have driven this back road route a few times, and can tell you that in my last trip it took two hours, but I also stopped to capture 95 images. Note that once you begin, it's not easy to turn around, and, as you'll see, I was in a Subaru Outback...AWD or 4 WD is highly recommended. (Don't say I didn't warn you!)

Below are some of the images that I selected in order to show a bit of what this alternate route looks like. The captions under the images tell the rest of the story.

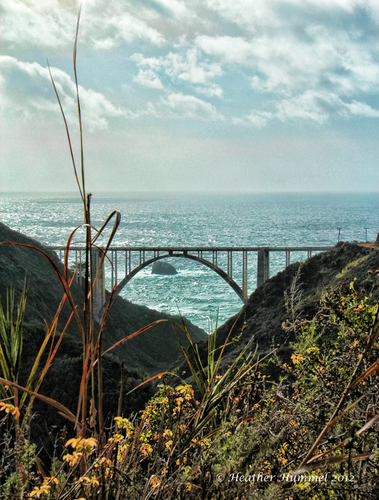
2013-11-13-BixbyBridgeLeaves.jpg
Photo Credit: Heather Hummel Photography
Bixby Bridge from the Old Coast Road. You can see a smidgen of the road/entrance on the right.

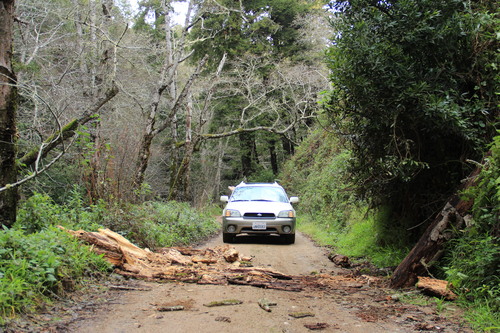
2013-11-13-BigSurBackRoads029.jpg
Photo Credit: Heather Hummel Photography
I set out with my dogs and Canon the day after a big storm. As you can see, trees were down, but you can't stop a Subaru with a few sticks in the road.

2013-11-13-BigSurBackRoads032.jpg
Photo Credit: Heather Hummel Photography
After clearing the road, I came upon this scenic view of Redwood trees a few tenths of a mile later. Definitely worth picking up a few sticks for.


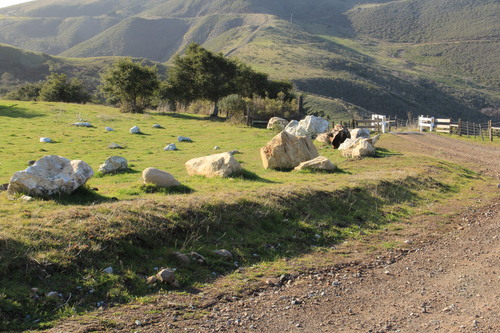
2013-11-13-BigSurBackRoads073.jpg
Photo Credit: Heather Hummel Photography
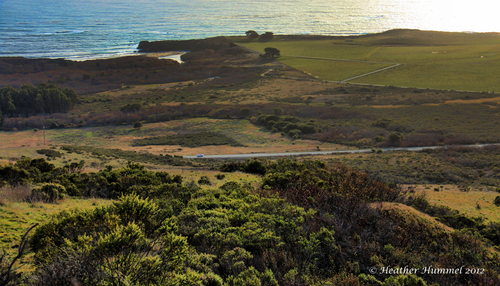
About midway, at the peak, the clearing provides stunning panoramic views, and this "Rock Pasture" in the midst.

2013-11-13-BigSurBackRoads049.jpg
Photo Credit: Heather Hummel Photography
After photographing the Rock Pasture, I looked down to see where we were heading...Seriously? I was glad to be in my Subaru! Another example as to why they (and I) highly recommend an AWD or 4WD vehicle. 


2013-11-13-VantagePoint.jpg
Photo Credit: Heather Hummel Photography
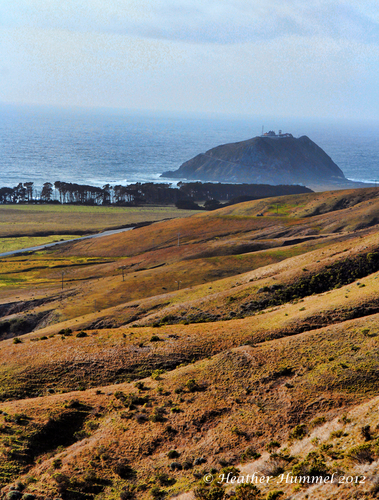
As the road starts to come down the other side into Big Sur, the views of the Pacific Ocean and Highway 1 open up again.

2013-11-13-BigSurBackRoadsHwy1View2.jpg
Photo Credit: Heather Hummel Photography
One last peak before descent.

If you're already in Big Sur, you can take Old Coast Road north and just go up a few miles and see these last few views shown. From the Bixby Bridge end, it's quite a drive - about 14 miles of rough roads - through the redwoods and mountains. The experience is very unique compared to what most visitors do, but be sure you have the right kind of car and be ready to be jostled. The captivating views and poetic beauty is worth the trip.


Want to learn how to master low light photography and to capture your own low-light photos? My book MASTER LOW LIGHT PHOTOGRAPHY is available on Amazon.

Tuesday, June 30, 2015

Our Obsession With Canopied Trees - A Seasonal Look

Photo Credit: Heather Hummel Photography

Last fall I was driving with a friend up to Wintergreen Resorts near Charlottesville, Virginia. We were on a quest for foliage -- any decent foliage since that year has been rather lackluster in color. As her car straightened out after a turn, a scene in the corner of my eye grabbed my attention.

"Stop!" I commanded. "Go back... that's the shot!"

Moments later I was kneeling down on a dirt road capturing a canopy of trees that was not quite peak, but certainly worthy of my motto, "Spreading Pixel Dust."

Later that night, as I scrolled through images, there it was, what I knew would be a new favorite.
It seems that people are most drawn to images of canopied trees. Admittedly, as a photographer, they are one of my favorite subjects. Whether it was when I lived in California's wine country, Colorado's Rocky Mountains, and now in the Blue Ridge Mountains, these gems have been a find on just about all of my photo shoots. After capturing enough tree-lined driveways, roads and meandering paths, I began to wonder what it is about these images that makes us so drawn to them.

Perhaps it's their fantastical allure that makes it so we can't help but get sucked up in their depth and wonderment. An artist knows that anytime a photograph draws you in by making your eyes travel through the scene, their image will gulp you up like a shark does a minnow.

I believe there is more to it, though. Exactly why does the scene draw us in? Are we hoping for answers at the other end of the proverbial tree tunnel? Does the cocoon of a canopy provide us with a feeling of safe regard? Maybe, just maybe, we are reminded of our childhood adventures of climbing trees and skinning knees? Whatever creates that magnetic pull, that desire to crawl inside the image and relish in the peace and tranquility for a spell, it soothes the soul on some level that keeps us wanting more.

The photographer's choice is how deep to go with the depth of field. To provide insight on how a photographer might think through their captures of canopied trees, I'm sharing three completely different scenes and what went through my mind as I photographed each one.

California's wine country presented the opportunity for this image. Depth of field wasn't my choice in this one since the fog in the distance, by nature, gave the scene a shallower depth. Yet, at the same time, I loved how the fog teases the viewer to come forth.

Photo Credit: Heather Hummel Photography
Winter in the Colorado Rock Mountains is magical. While most were on the famous ski slopes, I was found spreading pixel dust on winter scenes. For this particular shot, I went with a higher depth of field because it was a crystal clear day. It was my goal to give credence to every snowflake. I also wanted to ensure the viewer's peak of Mt. Sopris in the distance, which creates the desire to run down the street to view it in its entirety.
Photo Credit: Heather Hummel Photography
Springtime in the Blue Ridge Mountains is one of the most welcoming experiences. This string of pear trees in Staunton, Virginia, quickly became a fan favorite. Of these examples, this one in particular speaks to the child in each of us. Spring represents rebirth and growth, and these trees make you want to climb them, and if you skin your knee, so be it. You are free!

Photo Credit: Heather Hummel Photography


Want to learn how to master low light photography and to capture your own low-light photos? My book MASTER LOW LIGHT PHOTOGRAPHY is available on Amazon.

Sunday, June 28, 2015

In the Field with Heather Hummel Photography: Charlottesville Parking Garage

In the Field with Heather Hummel Photography is a series of 2 minutes videos that take viewers behind the camera on photo shoots with landscape photographer Heather Hummel.

In this edition, Heather Hummel takes viewers on location at the top of a parking garage. Learn why parking garages are great locations for photo shoots!

Want to learn how to master low light photography and to capture your own low-light photos? My book MASTER LOW LIGHT PHOTOGRAPHY is available on Amazon.

Friday, June 26, 2015

Photographers, Don't Think You Need to Register Your Copyrights? Think Again

2014-12-16-HeatherHummelSummerSkyLR.jpg
"Summer Sky"
Photo Credit: © Heather Hummel Photography

So many people get caught up in the fact that "you don't have to register the copyrights to your work because it's copyrighted the moment you create it." True. Anything you create is protected by copyright the moment you create it. HOWEVER, if you want real protection and legal hold when it comes to your work being stolen (copyright infringement), it's worth the few minutes and few dollars to register it.

Last spring when I discovered eight of my own images had been copyright infringed, I became particularly passionate about the legal rights of artists. I was fortunate that I had done a few things to help with protecting my work. One step was including a copyright statement, which is clearly stated, on my website. But, the most important step I took was not only registering my copyrights, but doing so in a timely manner. As such, several of my images that were stolen had already been registered with the U.S. Copyright Office upon infringement. I can attest that it was worth the few pennies per image to do so.

For example, the fee for me to register 184 photos for 2013 and 134 photos for 2014 was $55 per batch. That was done via an online registration form with the U.S. Copyright Office. Note that the limit per batch is 250 photos for $55 and batched by calendar year. The $110 to register several hundred photos was the best insurance policy I've ever bought. I will also add that the people I spoke to and e-mailed with from the U.S. Copyright Office were incredibly helpful and knowledgeable.

So,why does registering matter? Since I'm not an attorney, and in order to shed legal light on the topic, I reached out to copyright attorney Carolyn E. Wright, who specializes in protecting photographers via her law firm, found online at Photo Attorney. She is not only a photographer herself, but she is incredibly knowledgeable in the field and was willing to answer some questions on the topic.

2014-12-16-CarolynEWright.jpg
Carolyn E. Wright 
HH: Why should an artist copyright register their work?

CW: When a photo is not registered with the U.S. Copyright Office prior to the infringement, or within three months of the first publication of the photo, a copyright owner may recover only "actual damages" for the infringement (pursuant to 17 U.S.C. 504 (b)), instead of statutory damages. Courts usually calculate actual damages based on your normal license fees and/or industry standard licensing fees. You also may recover the profits the infringer made from the infringement if they aren't too speculative.

If your photo is timely registered for an infringement, you will be eligible for statutory damages of up to $150,000 for a willful infringing use. See 17 USC §504(b) and (c). You also may be able to recover some of your legal fees and court costs from the infringer. See 17 USC §505. Additionally, you need to have received your registration certificate to file a complaint for a copyright infringement lawsuit in most federal courts.

HH: With so many artists posting their work online, how important is it to use the © symbol, and what is the proper format? 

CW: Including a copyright no¬tice is no longer required for copyright protection, but it is a good idea to use it. When the copyright notice is used, it may stop someone from stealing your art, either because it serves as a reminder that the work is protected or because the notice interferes with the use of the work. When you post a copyright notice along with your registered images, then the infringer cannot claim that the infringement was innocent (reducing the damages to as low as $200 per work) and a court is more likely to find that the infringement was willful, supporting the maximum in infringement damages.

The official copyright notice has three parts: the first part is the © (the letter "c" in a circle), the word "Copyright," or its abbreviation, "Copr." The second part notes the year when the work was first published. The third required part of a copyright notice is the name of the copyright owner. For example, the final format looks like this: © 2014 Carolyn E. Wright.

2014-12-16-CEWspeakingbyKristinBoydwithcredit.jpg
Carolyn E. Wright: Photo Credit © Kristen Boyd
HH: What immediate steps should an artist take when they find their work has been copyright infringed?

CW: Many people think that they have a right to use your photos or they won't be caught if they do. When you find an infringement, make copies of it. Once the infringer realizes that she is caught, she will do what she can to get rid of the evidence of the infringement. Check whether your copyright management information (such as your name, contact information, and copyright notice) is included in or has been removed from the infringing use.

Fortunately, there are many tools to battle copyright infringement. Three steps include:

1. Prepare a DMCA Take-Down Notice. Thanks to the U.S. Digital Millennium Copyright Act ("DMCA") enacted in 1998, the Internet Service Provider ("ISP") that hosts a website is not liable for infringement only if the ISP removes the infringing materials from a user's website after receiving proper notice of the violation. The notice must: be in writing, be signed by the copyright owner or the owner's agent, identify the copyrighted work claimed to be infringed (or list of infringements from the same site) and identify the material that is infringing the work. Additionally, the notice must include the complaining party's contact information, a statement that the complaint is made in "good faith," and a statement, under penalty of perjury, that the information contained in the notification is accurate and that the complainer has the right to proceed (because he is the copyright owner or agent).

2. Another option is to prepare a "cease and desist/demand letter yourself. When you don't want to alienate the infringer (the infringer is a potential client and/or appears to be an innocent infringer), you may want to contact the infringer to explain that the use is not authorized and either request payment of an appropriate license fee, a photo credit with a link to your website, or that the infringer cease use of the image. It's best to do this in writing--a letter by surface mail seems to have more clout than email correspondence.

3. The most aggressive option is to pursue legal remedies by filing suit. Unless there is a breach of contract or some other state claim, infringement claims are filed in a federal district court. To file suit, it is best to hire an attorney because the legal procedures are complicated. Note that you have three years from the date of infringement to sue for copyright infringement.

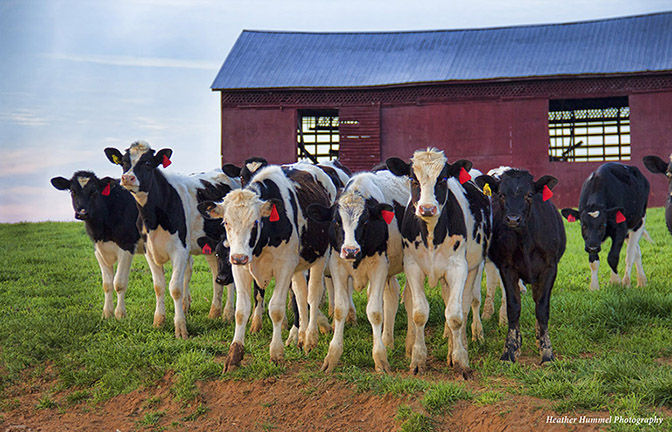
2014-12-16-HeatherHummelPhotographyMadisonCountyCows.jpg
"Madison County Cows"
Photo Credit: © Heather Hummel Photography

I often hear that "there's nothing you can do if you post images online, expect to have them stolen." In fact, there are plenty of steps an artist can take to protect their work. Start with registering copyrights at http://www.copyright.gov/.


Wednesday, June 24, 2015

An HDR Photo Expedition - Cottonwood Pass, Colorado

Few days go by that I don't spend time writing or editing balanced with capturing images. It's why I'm a self-titled PhotoNovelist! After several hours of editing a client's manuscript one morning (a very funny and well written manuscript, I'll add), I loaded my dogs up in the car and headed toward Cottonwood Pass near Carbondale, CO.

As mostly a landscape photographer, I started to dabble in HDR (High Dynamic Range) photography. It intrigues me because of the art of it. With HDR a lot of thought goes into an image capture both during the shoot and in the post-processing.

Composition is still always at the forefront of my mind. It's the first thing I look for, even before lighting. I then consider lighting, but in a different way than non-HDR photography, such as traditional or black and white. Since HDR's role (simplified) is to address shadows in an image, as I'm capturing one I consider how the shadows are going to work to my advantage (or disadvantage).

In the picture of the 1888 schoolhouse, I used a polarizing filter to enhance the sky and the clouds, all the while considering the sunlight on the fields behind the schoolhouse and how that would play into the end result.

For the fence image, I waited several minutes for the sun to come out from behind the clouds so it would highlight the fence and not wash out the sky.

I was thrilled to see the reflection of the barn on the pond in the next image. The polarizing filter would have removed the reflection, so I used it to once again enhance the sky and to allow the reflection on the water.

The three at the bottom are additional favorites from today's shoot. Each one reminds me how amazing and what a beautiful place Colorado is!


Visit my photography website at www.HeatherHummelPhotography.com for more photos!